RV Roof Coating Tips and Recommendations
RV roof coating is something every RV owner should know about. After all, what’s the point of an RV without a functioning roof over your head to keep you warm and dry?
As a popular Oregon RV park, we see a lot of people camping in the rain, so we’ve learned the importance of a properly sealed RV roof firsthand. Even a tiny leak in the roof of your RV can completely derail your vacation. We put together this thorough guide so that you can enjoy your RV all throughout the year, rain or shine!
What Is the Best RV Roof Sealant for Your RV?
Finding the best RV roof sealant starts with one important reality: there is no single product that works for every rig. The right choice depends on your roof material, your local climate, and how you use and store your RV.
Most RVs are built with one of three roof types: rubber (EPDM or TPO), fiberglass, or aluminum. Each requires a different sealant to perform properly. Using an incompatible product can mean poor adhesion, a failed seal, or damage to the roof membrane. A good sealant creates a watertight barrier, flexes with temperature changes, and holds up under UV exposure without cracking or peeling over time.
As a year-round Oregon RV park, we’ve seen firsthand what Pacific Northwest weather can do to an unprotected roof. Matching your sealant to your specific roof material is the single most important step in the process. The sections below cover the three main roof types and their sealant needs, the features to prioritize, how long RV roofs typically last, and the common mistakes to avoid.
Types of RV Roof Materials and Their Sealant Needs
Before you shop for the best coating for rv roof protection, you need to know what your roof is made of. Each material has different requirements and behaves differently under UV exposure, road vibration, and weather. The Florida RV Trade Association has a clear breakdown of the major roof types and what maintenance each one requires. If you are not sure which material your RV has, check your owner’s manual, look for a label inside the roof hatch, or ask your dealer.
Rubber Roof (EPDM/TPO)
Rubber roofs are the most common type. EPDM (ethylene propylene diene monomer) and TPO (thermoplastic polyolefin) are both lightweight, flexible, and relatively affordable, making them the standard choice for travel trailers, fifth wheels, and most Class C motorhomes.
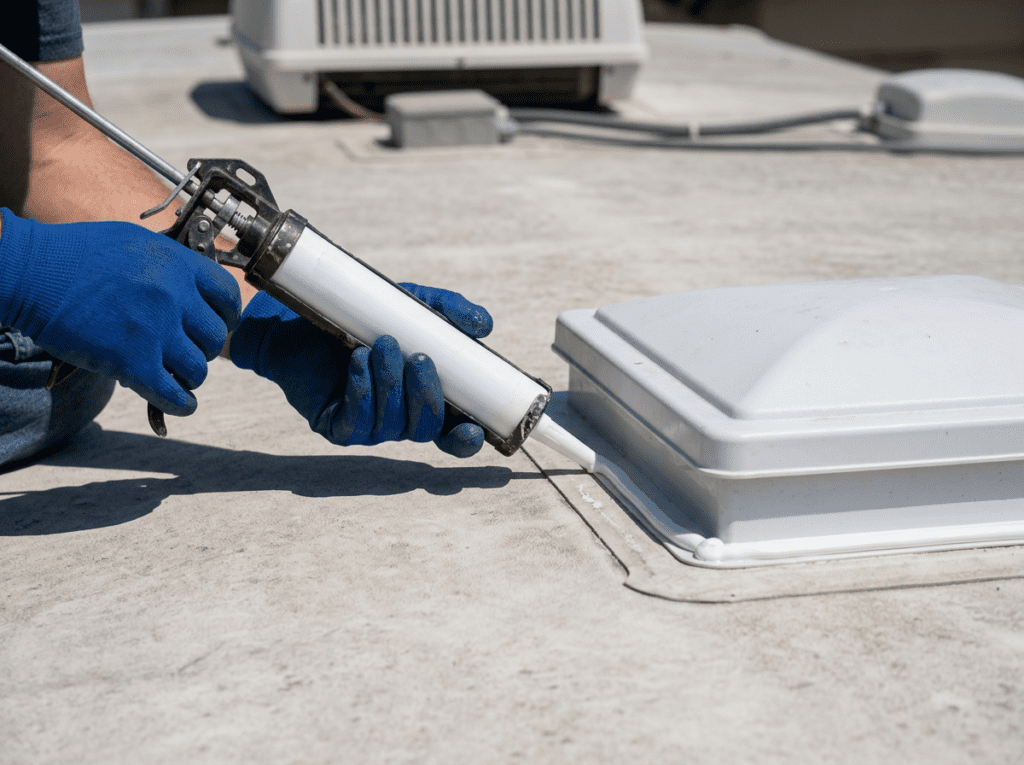
For rubber roofs, look for a sealant that is flexible, UV-resistant, and specifically formulated for EPDM or TPO surfaces. Dicor self-leveling lap sealant is one of the most widely trusted options for horizontal seams. For vertical surfaces like edges and trim, a non-sag sealant is the better choice, since it holds in place rather than running before it cures.
Avoid petroleum-based products entirely if you have a rubber roof. They break down the membrane and so can void your warranty. For the best RV roof sealant for leaks on a rubber surface, look for water-based or EPDM-compatible formulas that stay pliable in cold temperatures.
Fiberglass Roof
Fiberglass roofs are more resistant to impact than rubber, but they can develop hairline cracks over time, especially around vents, skylights, accessories like antenna mounts, and any hardware that sees repeated stress. Catching those cracks early is the key to keeping moisture out.
For fiberglass surfaces, silicone-based and polyurethane sealants typically offer the strongest bond and the best long-term flexibility. Always check the product label for fiberglass compatibility before applying. Not all RV sealants are formulated for this material, and an incompatible product can cause adhesion failure. Fiberglass roofs generally don’t need full recoating as frequently as rubber ones. Targeted sealing at seams and penetration points, done consistently, is usually enough.
Aluminum Roof
Aluminum roofs are less common on modern RVs but still found on older Class A motorhomes and some heavy-duty builds. They are durable and long-lasting, but the seams between aluminum panels are a reliable source of leaks when they’re left unmaintained.
The best RV roof sealant for aluminum roof applications needs to be waterproof, corrosion-resistant, and capable of bonding to metal. Self-leveling butyl or urethane sealants work well for horizontal seam applications, while a non-sag formula handles vertical surfaces. Dicor lap sealant and Alpha roof sealants are two options frequently recommended for aluminum surfaces by the pros. Confirm any product is labeled as metal-compatible before applying.
How Long Do RV Roofs Last?
One of the most common questions RV owners ask is, how long do RV roofs last? The answer depends on the material and how well the roof has been maintained, but here are the general benchmarks to know.
Rubber (EPDM/TPO) roofs typically last 10 to 20 years with proper care. Fiberglass roofs can last 20 to 30 years. Aluminum roofs often exceed 30 years in good condition.
Usually, the main thing that shortens a roof’s life is neglect. A roof that goes two or three years without inspection or recoating is far more likely to fail early, and full replacement can run $3,000 to $10,000 or more. Family Handyman’s guide to silent signs of roof failure is a helpful reference for understanding what early deterioration actually looks like.
Consistent maintenance extends the roof’s life, and also protects the floors, walls, and structural framing underneath. Oregon’s wet winters make for a lot of moisture exposure, which means regular inspection is especially valuable for those of us calling the Silverton area our home base. A well-timed coat of the best coating for rv roof protection costs a fraction of what interior water damage will run you later.
Key Features to Look for in the Best RV Roof Sealant
When comparing the best rv sealants on the market, knowing what performance criteria actually matter helps the narrowing-down process. Bob Vila’s hands-on testing of top roof sealant products is a solid starting point for comparing specific formulas.
UV protection. Sealants without UV stabilizers crack and degrade faster, even in cloudy climates. UV rays work year-round and cause breakdown in rubber, silicone, and acrylic materials alike. Look for products that specifically note UV resistance on the label.
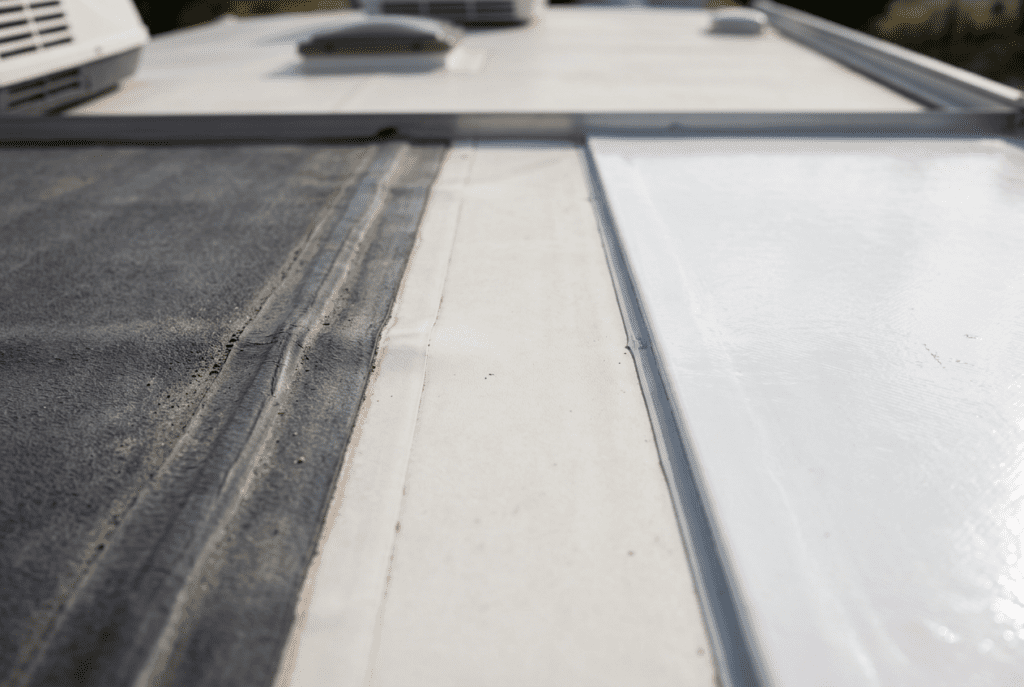
Waterproofing ability. This is the core function. A good sealant creates a continuous, gap-free bond around seams, edges, vents, and any roof penetrations — the places where leaks almost always start. Pay particular attention to coverage along the lap joint where the roof membrane meets the sidewalls, since this seam accounts for a significant share of RV roof leaks. Products marketed as the best roof sealant for leaks will typically lead with waterproof performance.
Flexibility. RVs expand and contract with temperature swings and vibrate constantly on the road. A sealant that becomes brittle in cold weather or cracks under movement will fail quickly. The best options remain pliable across a wide temperature range, flexing with the roof rather than pulling away from it.
Easy application and drying time. Most quality sealants apply with a standard caulk gun or roller brush and cure in 24 to 48 hours under normal conditions. Some require a primer; others do not. Factor in your local weather window when planning the job. You want to keep your RV off the road and its roof out of the rain for at least two days after application.
Signs Your RV Roof Needs Attention
Catching roof issues early can mean the difference between a quick reseal and thousands of dollars in repairs. Even if your RV roof looks okay from a distance, subtle signs of damage often go unnoticed until it’s too late. This section covers what to look for, inside and out, to stay ahead of costly problems.
RV Roof Leak Detection Tips
A leaking RV roof doesn’t always start with a drip. It often begins with small cracks, loose seams, or aging sealant. The certified technicians at RV Help have a detailed inspection guide covering each roof type. Here’s how to spot problems before they do real damage:
- Inspect your roof every 2–3 months and after big weather swings
- Walk the roof (if safe) or use a ladder to scan for:
- Soft, spongy, or uneven areas
- Loose or cracked sealant around vents, skylights, and antenna mounts
- Bubbles, peeling, or discoloration in the roof material
- Check inside for:
- Ceiling stains or soft spots
- Musty odors (a sign of moisture inside the walls)
- Warping wallpaper or sagging panels near the ceiling
Pro Tip: Run a hose over your roof to simulate rainfall. Have someone inside check for drips or dampness, especially around seams and fixtures.
Common Mistakes to Avoid When Applying RV Roof Sealant
Even when RV owners are motivated to take care of their roof, a few common mistakes can undermine the results or create entirely new problems. Here are four worth knowing before you start.
Skipping proper cleaning before applying sealant. Sealant will not bond to a dirty, chalky, or greasy surface. Clean the area thoroughly with an appropriate RV roof cleaner and let it dry completely. Our guide to RV detailing covers how to clean your roof without causing damage to the surface.
Using the wrong type of sealant for your roof. A Dicor sealant designed for EPDM rubber is not the right product for a fiberglass or metal surface. And a self-leveling formula applied to a vertical seam will run off before it cures. Match the product to both the roof material and the surface you are sealing.
Applying layers that are too thick or too thin. Follow the product’s coverage guidelines. A coat that’s too heavy takes longer to cure and may not adhere uniformly. Too thin, and you risk gaps that allow water through.
Not allowing enough curing time. Most sealants need 24 to 72 hours to cure fully before exposure to rain, humidity, or road vibration. Applying a fresh coat the day before a storm or a long drive can cause it to fail before it has set.
RV Rubber Roof Coating & Other Types of Sealant
Not all RV roofs are created equal – some have rubber roofs and others have metal or fiberglass roofs. It’s important to know what kind of roof your RV has and take this into consideration when choosing what type of RV roof coating to use. RV roof coatings are generally used to cover the entire roof, while “sealants” are sometimes used to patch up specific cracks, leaks, or damaged areas of the roof. However, the terms coating and sealant are often used interchangeably.
Comparing Popular RV Roof Coating Types
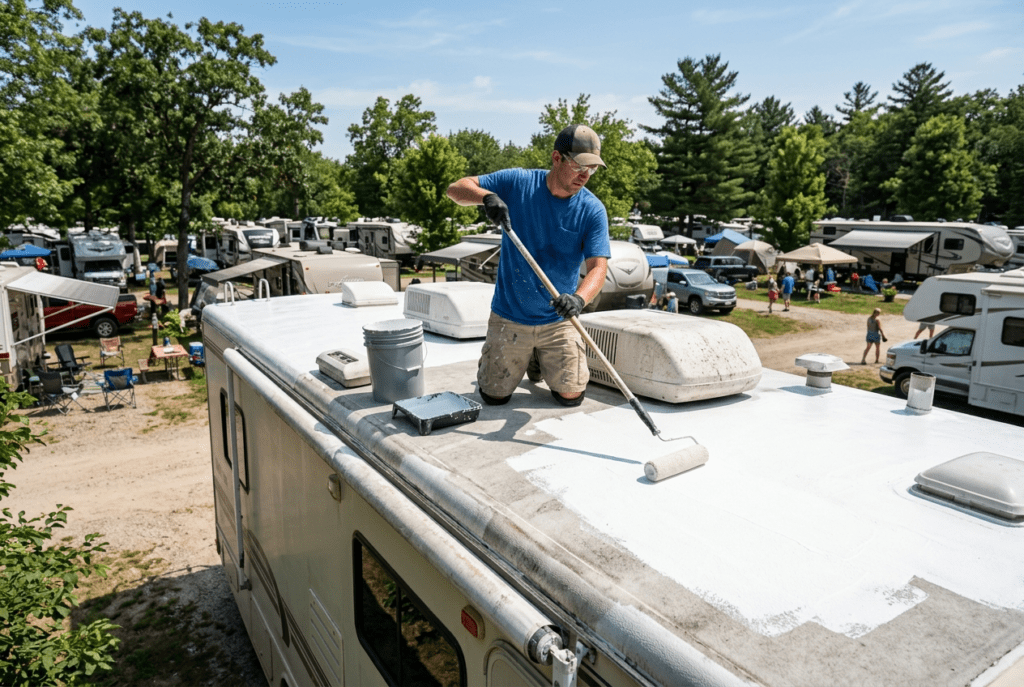
To help you make an informed decision about the best RV roof coating, below are some popular types available and the pros and cons of each.
Acrylic roof coating: Acrylic roof coatings tend to be less expensive than other types. They are UV-resistant and offer solid leak protection. On the flip side, this type of coating often requires more than one coat and is not considered the best option for roofs that are susceptible to pooling or standing water.
Urethane roof coating: Urethane coatings offer the same benefits as acrylic coatings, but are considered more durable and can hold up slightly better to pooling water. They typically require two coats and are more expensive than acrylic coatings.
Silicone roof coating: Silicone coatings are more expensive than acrylic or urethane, but offer even greater protection. Although they cost more per gallon, they only require one coat and no primer. This type of material is also more elastic and less susceptible to drying out or cracking over time.
Rubber sheeting: In addition to liquid coatings, there are also many types of rubber sheeting to choose from. Some of the benefits of rubber roof sheeting include temperature insulation, noise insulation, clean appearance, ease of repair, and low maintenance. Compared to liquid coatings, however, rubber sheeting is less flexible and can be more challenging to work with. Improper installation can lead to leaks.
When in doubt, check your RV owner’s manual or ask your dealer for tips on RV roof maintenance and coating. There are many products out there that claim to be the best, so do your due diligence and be sure to read customer reviews!
When to Recoat or Reseal RV Roof
How often should you recoat your roof? It depends on your environment, usage, and roof type – but here are some general guidelines:
- Rubber roofs: Every 1–2 years
- Silicone coatings: Every 2–3 years
- Acrylic coatings: Annually for best results
If your roof starts looking dull, chalky, or cracked, it’s time. And if you’re heading into winter or a long trip, it’s smart to inspect and recoat proactively. Keeping a seasonal maintenance calendar can help you stay on top of it all.

Best Practices to Extend the Life of Your RV Roof
The right sealant matters, but applying it once and walking away is not enough. Escapees RV Club has a practical DIY maintenance guide that covers the day-to-day habits worth building.
Regular inspections every 3–6 months. Don’t wait for a visible drip or a ceiling stain. Check seams, vent seals, edges, and mounting hardware every few months. Catching a small crack early is far less expensive than dealing with water damage inside the walls or subfloor.
Keep the roof clean and debris-free. Leaves, pine needles, sap, and bird droppings hold moisture against the surface and degrade sealants over time. Clean the roof two to four times a year with an RV-appropriate cleaner suited to your roof type, and rinse thoroughly.
Fix small leaks immediately. A hairline crack at a seam or around a vent mount can be addressed with a lap sealant or sealant tape in under an hour. Left alone, that opening allows water into the substructure where damage compounds invisibly for months.
Store your RV properly when not in use. UV exposure, tree sap, standing water, and temperature cycling all shorten coating life. When possible, store under cover or use an RV-specific cover during extended storage. This simple step can meaningfully extend the interval between recoating cycles.
RV Roof Repair: DIY vs. Professional Help
So, should you handle these RV roof repairs yourself or call in a pro? Here’s a quick rundown:
DIY Pros:
- More affordable (you’ll mostly pay for the product)
- Convenient for minor resealing or touch-ups
- Great option if you’re already comfortable with basic RV maintenance
DIY Cons:
- Requires safe roof access and dry weather
- Mistakes can void warranties or lead to new leaks
When to Call a Pro:
- Large sections of cracked or torn membrane
- Water damage inside the walls or ceiling
- If you’re unsure what material you’re working with
Once You’ve Taken Care of Your RV Roof Coating, Hit the Road!
Coating your RV roof is a hassle, but when you’re nice and cozy in your RV on a stormy night, you’ll be happy that you stayed on top of your RV maintenance!
Once you’ve taken care of your RV maintenance and you’re confident that your roof is ready to keep you warm and dry, you can hit the road and enjoy your RV at any time of the year, in any climate. Go live your life to the fullest!
If you’re looking for a great year-round RV destination, come stay with us at Silver Spur. We’re open 365 days a year and offer tons of amenities and entertainment to ensure your stay is comfortable and enjoyable, rain or shine.
When you’re ready, reserve your stay at the best rv park in Oregon’s Willamette Valley.
